How to Build a DIY Model Rocket: Safe Science Experiments for High Schoolers
Staring at textbook diagrams of motion, gravity, and aerodynamics is one thing, but witnessing those exact forces lift a physical vehicle hundreds of feet into the sky is an entirely different level of learning. For high schoolers looking to bridge the gap between classroom theory and real-world execution, building a DIY model rocket represents the ultimate hands-on scientific odyssey.
Historically, amateur rocketry was a highly dangerous, unregulated hobby. Today, thanks to standardized manufacturing, non-explosive solid-propellant engines, and strict safety guidelines, model rocketry has become one of the most popular, high-yield, and safe rocket experiments for high schoolers globally.
If you are a student looking to win your next school science exhibition, an educator looking to liven up your STEM classroom, or a parent searching for a meaningful weekend project, this logic-driven, comprehensive blog post is your ultimate roadmap. We provide a step-by-step assembly guide, explain the core physics of flight stability, outline the essential components of a launch pad, and establish vital safety checklists to ensure your backyard launch is both spectacular and completely safe.
1. Understanding the Physics: How a DIY Model Rocket Actually Works
Before gathering your cardboard, balsa wood, and glue, you must first understand the physical forces that govern a rocket’s flight path. A rocket does not simply fly because it has an engine; it flies straight and stays stable because of its physical, aerodynamic design.
During flight, your DIY model rocket is continuously subjected to four primary forces:
Thrust: The upward force generated by the rocket motor as it expels hot exhaust gases downward.
Gravity: The downward force pulling the mass of the rocket toward the center of the Earth.
Drag: The physical air resistance pushing back against the rocket’s forward motion.
Lift: Aerodynamic forces generated by the fins and nose cone that help keep the rocket on a straight course.
To ensure your rocket flies straight up rather than spiraling out of control, you must balance two crucial geometric points: the Center of Gravity (CG) and the Center of Pressure (CP).
The Center of Gravity is the exact physical balance point of the rocket. If you were to balance the completed vehicle on your finger, the point where it stays perfectly horizontal is the Center of Gravity. The Center of Pressure is the point where all the aerodynamic forces of lift and drag act on the rocket.
For stable, straight flight, the aerodynamic rocket design must ensure that the Center of Gravity is located ahead (closer to the nose cone) of the Center of Pressure (closer to the tail fins). If the Center of Pressure moves ahead of the Center of Gravity, the rocket will flip end-over-end as soon as it leaves the launch rod, leading to a catastrophic flight failure. To explore more about the history of space travel, launch physics, and basic aerodynamic layouts, you can consult the NASA Rocketry Science Educational Portal.
2. Essential Materials: Gathering Your Rocket-Building Supplies
One of the greatest advantages of modern model rocketry is that you do not need expensive, military-grade materials to build a high-performance vehicle. In fact, heavy materials like metal or thick plastics are active safety hazards and should never be used. Instead, easy DIY rockets are constructed using lightweight, high-strength household items.
To begin your building a model rocket step by step project, gather the following supplies:
The Body Tube: A lightweight, rigid cardboard tube. Empty paper towel rolls or specialized mailing tubes work beautifully.
The Nose Cone: A solid piece of balsa wood, lightweight plastic, or carved Styrofoam.
The Fins: A sheet of thin balsa wood, heavy poster board, or rigid plastic sheets (like old CD cases).
The Shock Cord: A thick, elastic band (like sewing elastic) roughly twice the length of the body tube.
The Parachute: A lightweight plastic sheet (such as a clean garbage bag or grocery bag) and sewing thread.
The Engine Mount: A smaller cardboard tube that fits snugly inside the main body tube, along with thick cardboard rings to hold it in place.
Adhesives: High-quality wood glue, white glue, or plastic cement. Avoid hot glue, as it can melt under the heat of the engine or become brittle in cold air.
To purchase standardized components, recovery kits, and pre-made solid motors safely, you can browse the official catalogue of Estes Rockets Industry Portal, which serves as the global standard for amateur rocketry manufacturing.
3. Constructing the Rocket Body Tube with Lightweight Materials
The body tube is the central structural spine of your DIY model rocket. It holds the engine mount at the bottom, houses the recovery parachute in the middle, and supports the nose cone at the top.
To prepare your body tube:
Audit for Damage: Ensure your cardboard tube is completely round, free of soft spots, and has clean, un-crumpled edges.
Install the Engine Mount: Assemble the engine mount by gluing the smaller cardboard ring spacers onto the outer surface of the motor tube. Apply a generous layer of wood glue inside the bottom end of the main body tube, and push the engine mount assembly inside until it sits flush with the bottom rim.
Allow to Dry: Let the internal engine mount dry completely for at least two hours before attaching any external components.
4. Designing the Nose Cone for Maximum Aerodynamic Performance
The nose cone’s primary job is to slice through the air, minimizing drag and guiding the airflow smoothly around the body of the rocket. An un-aerodynamic nose cone will increase drag, capping your rocket’s overall altitude.
When carving or shaping your nose cone, aim for an ogive (parabolic) shape. This curved, pointed silhouette offers the lowest possible drag at subsonic speeds.
Once your nose cone is shaped:
Sand to Perfection: Use fine-grit sandpaper to ensure the outer surface is completely smooth. Any bumps or rough edges will create localized turbulence, disrupting the flight path.
Check the Fit: The base of the nose cone (the shoulder) must fit snugly inside the top of the body tube. It should be loose enough to be pushed out easily by the parachute ejection charge, but tight enough that it does not fall off when the rocket is inverted.
5. Crafting and Aligning Stable Fins for Straight Flight Paths
Fins are the absolute most critical component for flight stability. They act like the feathers on an arrow, creating drag and lift at the tail of the rocket to keep the nose pointed straight up into the wind.
To construct and align your fins:
Choose Your Shape: The most stable shape for a beginner is the swept-back trapezoid or delta fin design. Cut three or four identical fins from your balsa wood sheet.
Sand the Edges: Sand the leading edges of the fins to be slightly rounded, and taper the trailing edges. This minor structural adjustment reduces aerodynamic drag significantly.
Meticulous Alignment: Use a fin alignment guide (drawn on paper) to mark three or four equally spaced vertical lines along the bottom of your body tube. Glue the fins onto these marked lines, ensuring they are perfectly parallel to the body tube. Even a minor angular misalignment will cause the rocket to spin wildly during flight.
6. Building the Recovery System (Parachute and Shock Cord Assembly)
A rocket that flies up must come down safely. To prevent your hard work from crashing back to earth at terminal velocity, you must install a reliable recovery system.
Attach the Shock Cord: Glue a paper mount holding one end of the elastic shock cord inside the upper third of the body tube. This elastic band absorbs the violent kick of the engine’s ejection charge, preventing the nose cone from ripping away from the body.
Assemble the Parachute: Cut a regular hexagon or octagon from your plastic garbage bag. Tie six equal lengths of sewing thread (shroud lines) to the corners of the plastic sheet, and tie the loose ends of the threads to the loop on the base of the nose cone.
Connect to the Nose Cone: Tie the loose end of the elastic shock cord directly to the nose cone as well, uniting the body tube, nose cone, and parachute into a single connected system.
7. Crucial Rocket Launch Pad Components: Launch Rods and Igniters
You cannot simply stand a model rocket on the ground and light the engine. During the first fraction of a second of flight, the rocket is moving too slowly for the fins to generate lift, making it highly unstable.
To ensure a safe lift-off, you must utilize a dedicated launch pad consisting of:
The Launch Rod: A thin, rigid metal rod inserted into the launch pad. Your rocket must have a small plastic straw (launch lug) glued to the side of the body tube. By sliding the launch lug over the launch rod, the rocket is guided in a perfectly straight, vertical line until it gains enough speed for the fins to take control.
The Blast Deflector: A metal plate at the base of the launch rod that protects the ground and grass from the hot exhaust gases of the rocket motor.
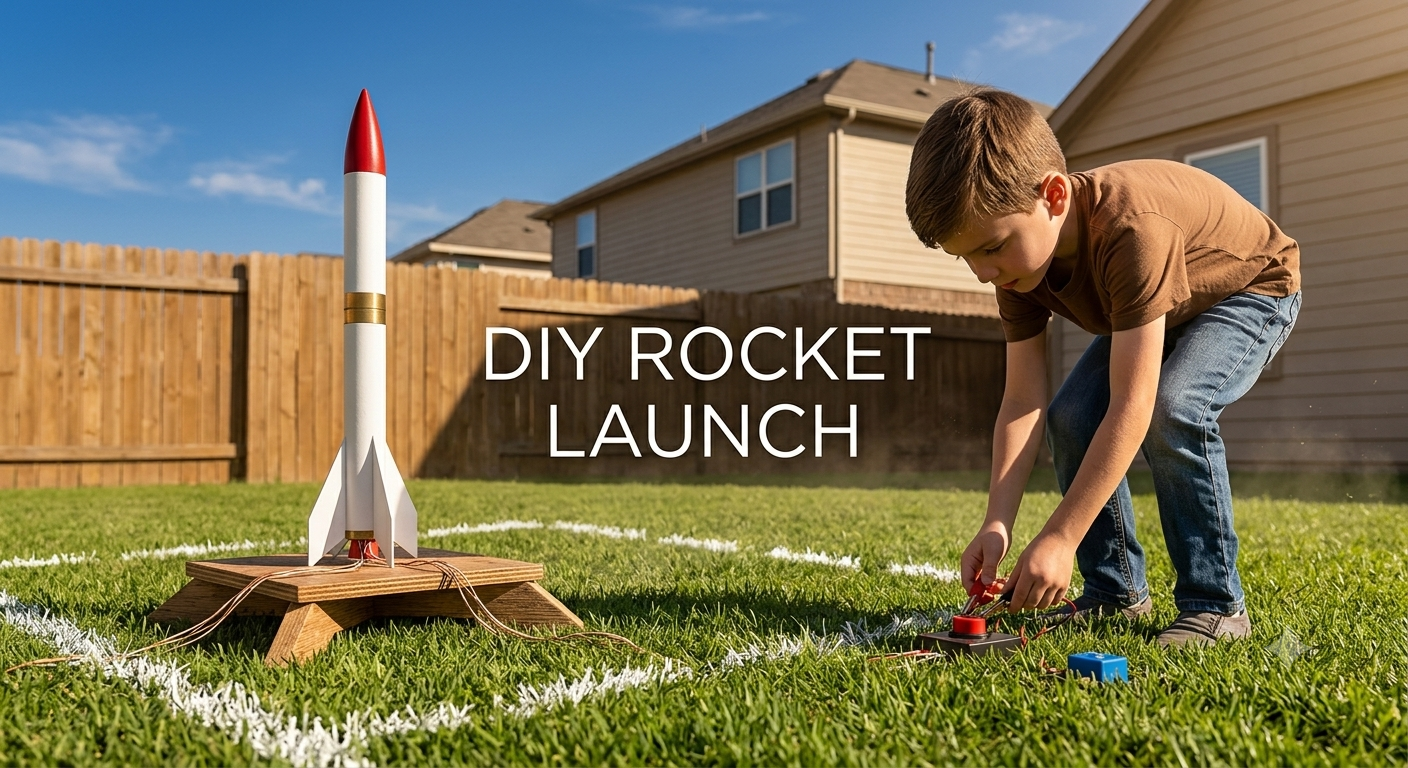
The Electronic Launch Controller: A battery-powered hand controller with a safety key and a launch button. This controller sends an electric current through long wires to an igniter inserted into the engine, starting the combustion process safely from a distance.
8. Model Rocket Safety Tips: Enforcing the NAR Safety Code
Model rocketry is an incredibly safe hobby, but only if you adhere to strict, non-negotiable safety rules. The global authority on amateur rocketry, the National Association of Rocketry (NAR), has established a comprehensive safety code that every high schooler must follow.
To review the full safety regulations, code updates, and official certification programs, you can consult the National Association of Rocketry (NAR) Safety Code.
Key safety rules include:
Never Use Metal: Never use metal parts for the nose cone, body tube, or fins. Metal represents a severe kinetic hazard if the recovery system fails.
Use Certified Motors: Never attempt to mix your own chemical rocket propellants or pack DIY engines. Only use factory-sealed, commercially certified solid rocket motors.
Ensure Clear Launch Areas: Launch your rockets only in wide, open spaces—such as empty sports fields, park clearings, or agricultural farmlands—away from power lines, tall trees, busy highways, and buildings.
Observe Safe Launch Distances: Always stand at least fifteen feet away from the launch pad during ignition. Keep all spectators behind the launch line, and ensure everyone is paying attention before counting down.
9. Choosing Your First Motor: Rocket Engine Classifications for Beginners
Commercial model rocket motors are categorized using a standard code consisting of a letter, a number, and a second number (such as A8-3 or B6-4). Understanding this coding system is essential to choose the right motor for your launch site:
The Letter (Total Impulse): Indicates the overall power or energy of the engine. Each sequential letter double the power of the previous one (e.g., a “B” motor has twice the power of an “A” motor, and a “C” motor has twice the power of a “B” motor). Beginners should always start with small A-class motors.
The First Number (Average Thrust): Indicates how fast the motor expels its energy. A higher number means a faster, more violent lift-off.
The Second Number (Time Delay): Indicates the number of seconds between the engine burnout and the activation of the ejection charge. This delay allows the rocket to coast upward, slowing down to its peak altitude before the parachute is deployed.
10. Launch Day Checklist: Ensuring a Successful and Safe Flight
To guarantee a successful launch day without last-minute technical panics, follow this step-by-step launch checklist:
Pack Recovery Wadding: Insert three to four sheets of flame-resistant recovery wadding into the top of the body tube. This wadding acts as a thermal shield, protecting your plastic parachute from being melted by the hot gases of the ejection charge.
Fold the Parachute: Fold the parachute into a tight, neat rectangle, wrap the shroud lines loosely around it, and slide it gently into the body tube on top of the wadding.
Secure the Nose Cone: Push the nose cone shoulder into the top of the body tube, ensuring no shroud lines or elastic cords are pinched in the seam.
Install the Igniter: Insert the commercial igniter into the nozzle of the rocket engine, securing it firmly with the provided plastic plug.
Slide Onto the Launch Rod: Slide your rocket’s launch lug over the launch rod, lower it onto the blast deflector, and clip the launch controller’s alligator clips directly to the igniter wires.
Verify Safety and Launch: Insert the safety key into the launch controller, clear the launch pad area, perform a loud, five-second countdown, and press the launch button!
11. Conclusion: Launching Your High School Scientific Journey
The ultimate verdict of amateur rocketry is highly empowering: academic excellence in physics and engineering is not reserved only for professional laboratory scientists. It is a practical, exciting capability that you can build with your own hands.
By building a DIY model rocket—using cardboard, balsa wood, and plastic sheets to master the geometric relationship between the Center of Gravity and the Center of Pressure—you completely eliminate the mystery of rocket science.
Embrace this structured, step-by-step checklist, stay disciplined in your safety protocols, protect your environment, and walk onto your launch field with the quiet confidence of a student who truly understands their craft. To explore additional STEM project guides, safety manuals, and classroom-ready lesson plans, you can review the collection of activities hosted on the Science Buddies STEM Project Directory. Happy launching!