5 Fun Backyard Biology Activities to Study Soil Micro-Life, Plant Osmosis (Class 5-8)
Every single day, an incredibly complex and invisible biological drama is unfolding right under our feet and inside the leaves of our favorite garden plants. For middle school students in Class 5 through Class 8, transitioning from textbook diagrams to real-world ecosystems can be a truly thrilling milestone. Rather than simply memorizing definitions of cellular membranes or soil taxonomies from a whiteboard, students learn best when they can touch, see, and manipulate variables in their own backyards.
Engaging in backyard biology activities allows young learners to transform into real-world field researchers, discovering that science is not a dry list of facts but a vibrant, ongoing adventure.
If you are a parent seeking safe, high-yield home science experiments to keep your child intellectually stimulated, or an educator searching for engaging, interactive class 5-8 science activities, you are in the perfect spot. This comprehensive guide explores five entirely free, highly immersive, and fun biology experiments for kids designed to reveal the mysteries of soil micro-life and plant osmosis without requiring expensive laboratory equipment or complex mathematical calculations.
1. Why Middle School is the Perfect Window for Hands-On Biology Labs
The developmental transition between elementary and high school is a critical phase for cognitive growth. During these years, young minds begin to move away from purely concrete observations and start grasping abstract systems. They can now conceptualize how invisible microscopic cells cooperate to support massive trees, and how diverse soil food webs regulate the global climate.
Traditional science classes can sometimes obscure these beautiful connections under thick layers of technical terminology.
By introducing highly visual, hands-on biology labs, we bridge the gap between abstract textbook pages and sensory reality. When students construct their own scientific tools and watch living organisms respond to environmental shifts, their brains form robust neural connections that protect against rote academic burnout, establishing a lifelong appreciation for the scientific method.
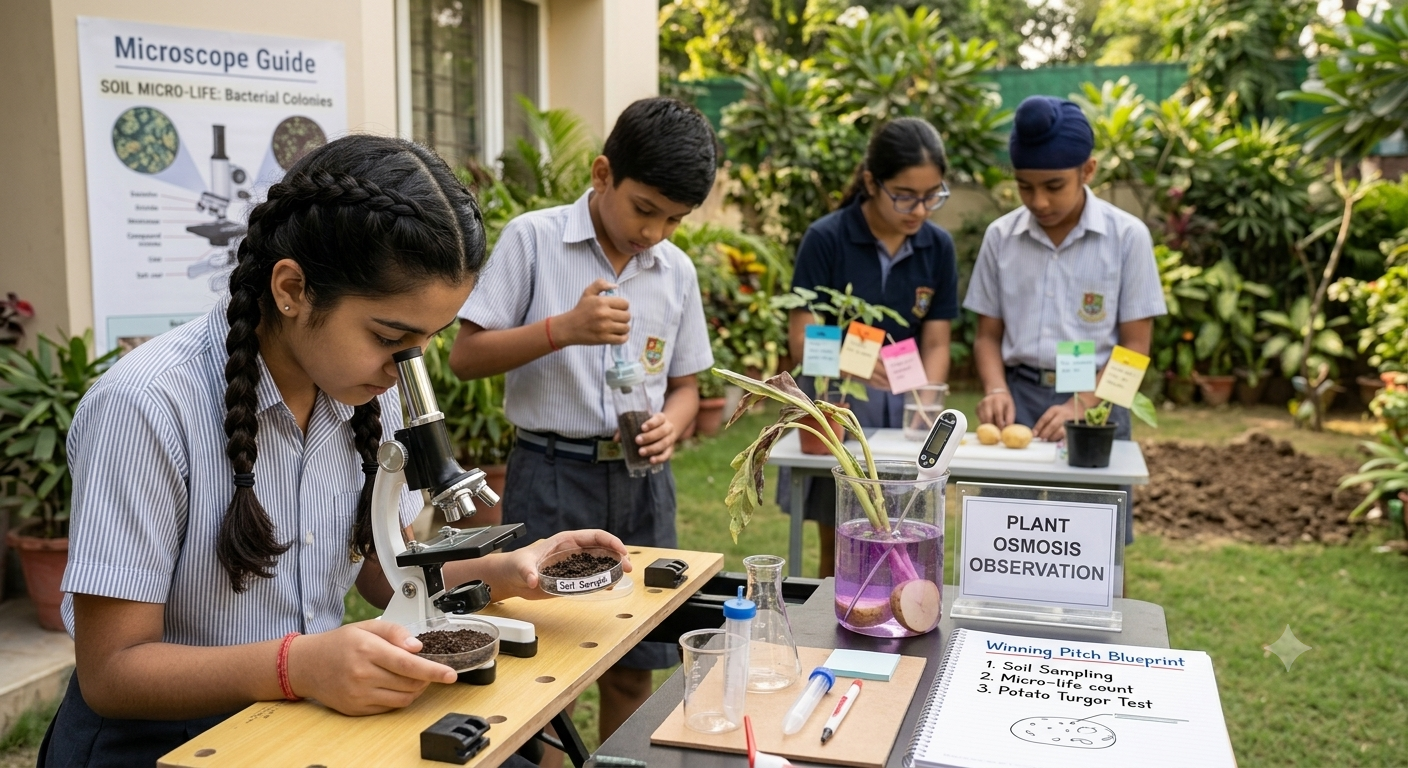
2. Setting Up Your Safe and Productive Backyard Laboratory Space
You do not need a sterile, high-tech cleanroom to conduct high-fidelity scientific research. Your garden lawn, patio, balcony, or schoolyard serves as the ultimate living laboratory. However, before launching your backyard biology activities, it is vital to establish a safe, organized workspace to ensure scientific accuracy and physical safety.
First, select a flat, solid outdoor table or bench to act as your primary laboratory station. Ensure your workstation is stocked with simple, everyday tools: reusable plastic cups, clear glass jars, safety tweezers, magnifying glasses, and a reliable notebook to record your field data.
To keep your learning aligned with national educational standards, parents and teachers can regularly explore free resource modules on platforms like the official Soils 4 Teachers Portal, which offers exceptional guidelines for structured outdoor earth science workshops.
3. Activity 1: The Berlese Funnel Trap (Exploring Hidden Soil Micro-Life)
Did you know that there are more living organisms in a single teaspoon of healthy soil than there are humans on planet Earth? Most of this soil micro-life consists of microscopic insects, mites, nematodes, and tardigrades that are completely invisible to the naked eye. This classic field experiment allows students to safely extract and observe these fascinating creatures.
Materials You Will Need:
A clean, plastic soda bottle (2-liter size)
A small piece of fine wire mesh, window screen, or 1/4-inch hardware cloth
Scissors and tape
A desk lamp with an incandescent bulb (or a warm, sunny windowsill)
A small glass cup filled with a thin layer of rubbing alcohol or warm soapy water
A fresh, moist soil sample gathered from beneath decayed backyard leaves
The Action Steps:
Carefully cut the plastic bottle in half using scissors. Turn the top half upside down to act as a funnel, and place it directly inside the bottom cup section.
Place your small piece of window screen at the bottom of the inverted funnel to act as a porous barrier.
Gently fill the funnel with your freshly collected damp soil sample, ensuring you do not pack the soil down too tightly.
Place the bottom collection cup (containing a tiny layer of warm soapy water) directly under the funnel spout.
Position your warm desk lamp directly above the open soil funnel, leaving it on for several hours.
The Biological Concept Explained:
This experiment is a brilliant demonstration of biological behavioral adaptations. Soil organisms thrive in dark, cool, and moist subterranean environments. As the warm light from the lamp slowly heats and dries out the top layers of the soil, the micro-arthropods and insects migrate downward to find moisture.
Eventually, they pass through the wire mesh barrier and tumble safely into your collection vial. Students can use a magnifying glass to count, draw, and categorize their captured organisms, utilizing classification resources hosted on KidsGardening Lesson Plans to identify different species of soil helpers.
4. Activity 2: Potato Slices and Salt Water (Visualizing Plant Osmosis)
Many students struggle to visualize how water molecules move across cellular membranes because cells are microscopic. The phenomenon of plant osmosis can be made instantly tangible using a simple, household potato slice and salt.
Materials You Will Need:
One raw potato
A knife (to be handled exclusively by parents or teachers)
Two clear drinking glasses
Plain tap water
Table salt
A marker and masking tape to label your cups
The Action Steps:
Fill both glasses with equal volumes of clean tap water. Label the first glass “Fresh Water” and the second glass “Salt Water.”
Add two full tablespoons of table salt to your second glass, stirring thoroughly until the salt crystals are completely dissolved.
Have a parent or teacher carefully cut the raw potato into four equal, rectangular slices or strips, roughly the size of thick French fries. Ensure the strips are firm and rigid.
Place two potato slices into the “Fresh Water” glass and the remaining two slices into the “Salt Water” glass.
Leave the glasses undisturbed on your workstation for at least one to two hours, then remove the potato slices to physically examine their texture.
The Biological Concept Explained:
Osmosis is the spontaneous movement of water molecules through a semi-permeable membrane from an area of low solute concentration to an area of high solute concentration. In this experiment, the potato cells contain a delicate balance of water and natural salts.
In the “Fresh Water” cup, the surrounding liquid is hypotonic (lower salt concentration than the potato cells), causing water to flow into the potato cells, making them feel incredibly rigid and firm.
Conversely, the “Salt Water” cup is hypertonic (higher salt concentration than the potato cells). This gradient forces water to flow out of the potato cells, leaving them limp, rubbery, and highly flexible. Exploring this visual feedback loop is one of the most effective plant osmosis experiments to help students master cell membrane dynamics.
5. Activity 3: The "Soil Your Undies" Active Biome Test (Measuring Soil Microbial Activity)
This incredibly popular, highly humorous, and globally recognized citizen science experiment is an absolute favorite for middle schoolers. It offers a direct, highly visual test to measure the overall health, decomposition capacity, and microbial density of your local soil.
Materials You Will Need:
A pair of 100% white cotton underwear (it must be pure cotton, as synthetic fibers will not biodegrade)
A small garden trowel or shovel
A physical wooden marker stake to identify your burial location
A camera to record your chronological progress
The Action Steps:
Dig a shallow, horizontal trench in your backyard soil about three to four inches deep.
Lay the white cotton underwear flat inside the trench, ensuring the material is in direct contact with the surrounding dirt.
Carefully cover the clothing with the excavated soil, taking care not to compact the earth too hard, and place your marker stake directly above the site.
Keep the soil area moist by watering it gently during warm, dry weeks to support active biological processes.
After exactly four to six weeks, gently dig up the underwear, rinse off any loose dirt, and document the physical condition of the fabric.
The Biological Concept Explained:
Healthy agricultural and garden soils are teeming with active, hungry decomposing organisms, including fungi, bacteria, and earthworms. These microorganisms use organic matter—including natural plant cellulose and pure cotton fibers—as their primary food source, breaking down complex carbon materials into rich, fertile humus.
If your backyard soil is healthy and biological activity is high, the cotton fabric will be heavily degraded, leaving behind only the synthetic elastic waistband.
If the underwear remains mostly intact, it serves as a critical diagnostic warning that your soil lacks organic matter, beneficial soil biota, or sufficient moisture. To find similar, highly collaborative outdoor earth science activities, check out the resources hosted on the Science Buddies Platform.
6. Activity 4: Celery Food Coloring Transpiration Walk (Tracing Osmotic Water Pathways)
Understanding how towering trees pull moisture from deep underground up to their leaves without a physical heart pump can feel like magic to a middle school student. This classic, highly visual experiment demonstrates how capillary action, active transport, and osmotic pressure work together to move water through plant xylem tissues.
Materials You Will Need:
Two fresh, leafy stalks of celery (celery with plenty of green leaves on top works best)
Two tall, clear glass jars or drinking cups
High-intensity liquid food coloring (bright red or dark blue yield the best results)
A sharp knife (for adult supervision)
Clean water
The Action Steps:
Fill both clear jars halfway with warm tap water.
Add fifteen to twenty drops of dark blue food coloring to the first jar, and red food coloring to the second jar, stirring until the color is vibrant and opaque.
Have an adult carefully cut about half an inch off the bottom of each celery stalk to expose fresh, unblocked vascular bundles.
Place one celery stalk upright into each colorful jar, ensuring the green leafy tops are dry and exposed to the open air.
Keep the jars in a bright, warm room for 12 to 24 hours, checking back periodically to observe the leaves.
The Biological Concept Explained:
This experiment is a stunning, multi-layered showcase of water transport dynamics. As water molecules evaporate from the celery leaves through microscopic pores called stomata—a physiological process known as transpiration—it creates a negative pressure or suction force at the top of the plant.
This tension pulls liquid up through microscopic vascular tubes called xylem. The food coloring travels alongside the water, gradually staining the celery’s vascular pathways and turning the green leaves on top bright red or dark blue.
If you carefully slice the celery stalk horizontally, you will see tiny, colored dots which represent the individual xylem tubes, offering an incredible visual window into plant vascular architecture.
7. Activity 5: The Mud Jar Siltation Test (Mapping Soil Composition & Aggregate Spaces)
Microorganisms do not simply float randomly in the dirt. They live in the tiny water-filled and air-filled spaces between physical soil particles. To understand how soil structure influences life, students must learn to map its physical texture.
Materials You Will Need:
One tall, clear glass jar with a tight-fitting screw lid
A measuring cup
A scoop of dry backyard soil (enough to fill about one-third of your jar)
Liquid dishwashing detergent
A clock or stopwatch
The Action Steps:
Carefully pour your dry backyard soil sample into your clear glass jar until it is about one-third full.
Add clean water until the jar is nearly full, leaving about an inch of air space at the very top.
Add three to four drops of liquid dishwashing soap to act as a surfactant, helping to separate the sticky soil aggregates.
Tighten the lid securely and shake the jar vigorously for at least two full minutes to ensure all particles are fully suspended in the water.
Place the jar on a flat, stable surface and let the particles settle over 24 hours, taking photos at diverse intervals.
The Biological Concept Explained:
Soil texture is determined by the proportional mix of three primary mineral particles: sand, silt, and clay. Because these particles vary significantly in size and weight, they settle out of the water suspension at different speeds under the influence of gravity.
Large, heavy sand particles settle to the bottom within 30 seconds. Medium-sized silt particles settle next, taking about two hours.
The microscopically small clay particles remain suspended for hours, slowly forming a distinct top layer over 24 hours. The organic matter will float at the very top of the liquid. Healthy soils contain a balanced loam mixture of sand, silt, and clay, creating a porous network of micro-cavities that retain oxygen, preserve capillary moisture, and host thriving colonies of beneficial microbes.
8. Crucial Diagnostic Indicators: Evaluating Your Backyard Soil Health
Once you have completed your Berlese funnel extraction, soil texture jar tests, and cotton underwear burial experiments, you can compile your data to build an overall health card for your backyard ecosystem. Use this diagnostic table to evaluate your findings:
Bio-Indicator Test | Healthy Soil Signposts | Poor Soil Signposts | Remedial Next Steps |
|---|---|---|---|
Berlese Funnel Trap | High abundance of active insects, mites, and centipedes. | Little to no visible micro-life or invertebrate movement. | Introduce organic compost and reduce synthetic chemical usage. |
“Soil Your Undies” Test | Fabric is heavily shredded, degraded, and full of biological holes. | Fabric remains mostly intact, clean, and structurally solid. | Improve soil moisture levels and integrate decaying plant matter. |
The Mud Jar Siltation Test | Balanced loam layers with plenty of floating organic humus. | Extreme sand layers with zero organic debris or floating particles. | Mulch the soil surface and cultivate diverse native cover crops. |
Evaluating these ecological bio-indicators helps students see that science is directly connected to their daily gardening practices, turning academic concepts into highly valuable, environmental life lessons.
9. Essential Educational Portals for High-Yield At-Home Biology Study
To help you expand your digital study workspace and find curriculum-aligned projects, we have compiled a list of the most secure, completely free scientific platforms available online:
National Geographic Kids Science: A world-renowned platform featuring highly engaging videos, games, and nature activities for young explorers. Access their science portal on National Geographic Kids.
The Soil Science Society of America (SSSA): Access teacher slides, color-coded soil taxonomy posters, and standard lesson plan templates on the official SSSA Soils 4 Kids Website.
Royal Society of Biology Education Resource: Explore excellent, globally respected biology guides, lesson plans, and experimental modules curated by professional educators on the Royal Society of Biology.
Integrating these highly authoritative, secure web platforms into your study schedule ensures your at-home backyard research remains accurate, safe, and aligned with standard high school expectations.
10. How to Keep a Structured Nature Journal: Tracking Your Discoveries
One of the most important habits of a successful scientist is meticulous record-keeping. You should never rely on memory alone to track your biological experiments.
To turn your outdoor biology labs into a structured portfolio, start a dedicated Nature Journal. For each of your backyard activities, ensure you document:
The Research Question: State exactly what you are trying to discover (e.g., “How does high salt concentration affect potato cells?”).
The Materials and Setup: Sketch a labeled diagram of your physical experimental setup, noting environmental conditions like temperature and soil moisture.
The Chronological Log: Write down your observations at regular, timed intervals, using colorful drawings, diagrams, and bullet points to organize your data.
The Ecological Conclusion: Paraphrase the underlying scientific principles in your own words, reflecting on what you learned and brainstorm what subsequent experiments you would like to tackle next.
Keeping a neat, structured nature journal builds essential writing skills, improves visual organization, and creates a proud record of your scientific journey.
11. Overcoming "Biology Boredom": The Power of Citizen Science Projects
Sometimes, students can lose interest in science if they feel their experiments are isolated from the real world. To spark continuous, year-round curiosity, parents can connect their children’s backyard activities with global, active scientific research.
Through the power of crowdsourced citizen science, middle schoolers can upload their soil, plant, and insect data to global research communities.
By taking photos of backyard bugs using mobile apps or documenting rainfall patterns in their local neighborhoods, young minds can help professional researchers map biodiversity shifts, monitor invasive species, and track the ecological consequences of climate change in real-time. Engaging in these projects teaches students that science is a collaborative, global effort, showing them that their backyard discoveries can directly expand humanity’s collective knowledge.
12. Conclusion: Stepping Confidently Into Your Backyard Classroom Today
Mastering middle school biology does not have to be a stressful battle fought with dry textbook terms, late-night cramming, and practical exam anxiety. By taking your study sessions outside and embracing the power of hands-on, outdoor activities, you can turn complex physiological and environmental concepts into an exciting, hands-on quest of discovery.
Whether you are using Berlese funnels to discover the bustling universe of subterranean micro-life, monitoring potato rigidness to visualize cell osmosis, or burying cotton underwear to test the metabolic hunger of soil microbes, you are actively participating in the grand human journey of scientific exploration.
Be patient with your learning process, stay endlessly curious, utilize the outstanding free resources highlighted in this guide, and step confidently into your backyard classroom, ready to conquer your design goals and build a bright, scientific future!