The Best Science Projects for Class 6, 7, and 8 School Exhibitions (With Materials & Steps)
School science exhibitions are a rite of passage for middle school students. They represent the thrilling moment when textbook concepts—like the water cycle, electric currents, chemical reactions, and pressure laws—leap off the flat pages of NCERT textbooks and transform into active, touchable, and real-world creations. For students in Class 6, Class 7, and Class 8, participating in a school science exhibition is an incredible opportunity to develop critical thinking, public speaking skills, and a lifelong passion for STEM (Science, Technology, Engineering, and Mathematics).
However, selecting a project that is both scientifically accurate and visually spectacular can be challenging. Many students end up building passive, non-working models (like cardboard volcanoes) that fail to impress judges who are actively looking for dynamic, working prototypes.
To help you stand out at your next school event, this comprehensive guide features the best science projects for Class 6, 7, and 8 exhibitions. Complete with detailed materials lists, step-by-step construction instructions, and clear scientific explanations, these working science models for middle school are guaranteed to turn heads and secure top-tier marks.
1. Choosing the Perfect Project: Aligning with Middle School Syllabus
Before diving into cardboard, wires, and hot glue, students must understand that the most successful projects are those closely aligned with their grade-level scientific benchmarks. Judges do not expect middle-schoolers to construct nuclear reactors; they want to see deep, conceptual understanding of standard middle school principles.
Class 6 Science Focus: Concrete observations of light, shadows, basic electrical circuits, water recycling, and simple plant biology.
Class 7 Science Focus: Heat transfer, acids and bases, clinical respiration, wind energy, and simple electronic components.
Class 8 Science Focus: Advanced atmospheric forces, pressure differentials, synthetic materials, combustion, electrolysis, and basic environmental sensors.
Aspirants looking to align their physical models perfectly with standardized grade-level curriculum maps can refer to the official NCERT Indian National Curriculum Portal, which lists the exact thematic guidelines for middle school science education.
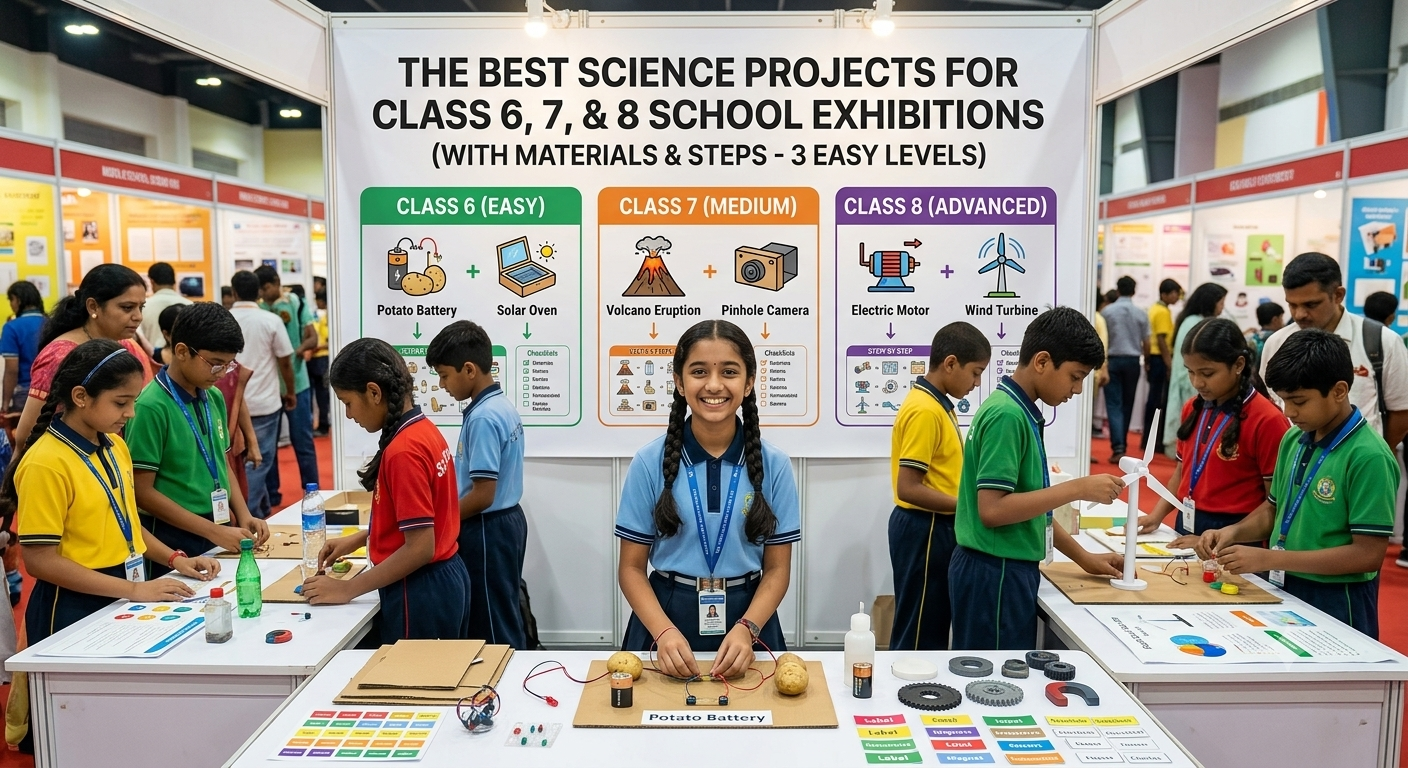
2. Class 6 Science Exhibition Projects: Exploring Energy, Water, and Light
Class 6 Science Exhibition Projects: Exploring Energy, Water, and Light serves as a dynamic, hands-on launchpad designed to ignite a lifelong passion for scientific inquiry. By stepping outside traditional textbook boundaries, students dive into practical models like solar-powered fans, water purification systems, and pinhole cameras. These projects encourage young learners to interact directly with core environmental principles and foundational physics concepts. Ultimately, this exhibition transforms abstract curriculum ideas into tangible realities, fostering critical thinking, creative problem-solving, and a deeper appreciation for the essential elements that actively power, sustain, and illuminate our everyday world.
3. Project 1 (Class 6): The Solar-Powered Smart Oven
This project demonstrates how solar energy can be concentrated to produce heat, introducing students to green technology, heat transfer, and light reflection. It is an incredibly popular science project for Class 6 students due to its direct, functional utility.
Materials Required:
An empty, clean cardboard pizza box.
Aluminum foil (highly reflective).
Black chart paper (excellent heat absorber).
Transparent plastic wrap or a clear sheet of plastic.
A wooden ruler or stick.
Scissors, clear tape, and glue.
A thermometer (to measure temperature spikes).
A small marshmallow or a slice of cheese (for cooking demonstration).
Step-by-Step Construction Steps:
Cut the Flap: Draw a square flap on the top lid of the pizza box, leaving a 1-inch border on three sides. Cut along these three lines to create a flap that opens upward.
Apply Foil: Line the inside of the cut-out flap with aluminum foil, keeping it as smooth and unwrinkled as possible. Secure it with tape. This acts as your solar reflector.
Seal the Opening: Cover the open window created by the flap with a double layer of transparent plastic wrap. Secure it tightly with tape to create an airtight, clear window. This seals the heat inside the box.
Prepare the Base: Line the bottom interior of the pizza box with black chart paper. Black absorbs incoming thermal radiation, converting it to heat.
Assemble and Test: Place your marshmallow or cheese slice on a small paper plate inside the box, directly under the plastic window. Close the box, open the foil-covered flap, and use a ruler to prop the flap open at an angle that reflects sunlight directly through the plastic window.
Track Temperature: Place the thermometer inside the box to record the temperature changes over 30 minutes in direct sunlight.
The Scientific Principle Explained:
This project demonstrates the greenhouse effect and heat absorption. Solar radiation (light waves) passes through the clear plastic wrap and is absorbed by the black paper at the bottom. The black paper converts light into thermal energy (infrared heat). Because the plastic wrap acts as a heat barrier, it prevents the warm air from escaping, creating a micro-greenhouse that cooks the food.
For more hands-on solar activities and atmospheric science insights, students can explore resources hosted on the NASA Space Place Educational Portal.
Lorem ipsum dolor sit amet, consectetur adipiscing elit. Ut elit tellus, luctus nec ullamcorper mattis, pulvinar dapibus leo.
4. Project 2 (Class 6): Multi-Stage Gravity Water Filtration System
This project demonstrates how natural filtration layers work, aligning directly with Class 6 chapters on separating substances, sedimentation, and water purification.
Materials Required:
A clean, transparent 2-liter plastic bottle.
A small piece of clean cotton cloth or cotton wool balls.
Fine sand (washed).
Coarse sand (washed).
Small pebbles or gravel.
Activated charcoal powder (optional, but highly effective for odor filtration).
Dirty, muddy water (prepared using soil and leaf litter).
A clean glass beaker or jar (to collect filtered water).
Step-by-Step Construction Steps:
Cut the Bottle: Carefully cut the plastic bottle in half using scissors. The top half will act as the filter funnel, and the bottom half will serve as the collection reservoir.
Add the Cotton Layer: Invert the top half of the bottle (spout facing downward) and place a thick layer of cotton wool or cloth firmly into the neck. This stops sand from falling through.
Layer the Charcoal: Add a 1-inch layer of activated charcoal over the cotton.
Layer Fine and Coarse Sand: Pour in a 2-inch layer of fine sand, followed by a 2-inch layer of coarse sand.
Layer the Gravel: Top the bottle funnel off with a thick layer of pebbles or gravel.
Run the Filtration Test: Place the funnel inside the bottom half reservoir. Slowly pour the muddy water over the gravel layer and observe how the water slowly drips down, clearing up in each stage.
+------------------------------------+------------------------------------+
| Filter Layer (Top to Bottom)       | Primary Function in Purification   |
+------------------------------------+------------------------------------+
| Gravel / Pebbles Layer             | Traps large leaves, twigs, debris  |
+------------------------------------+------------------------------------+
| Coarse and Fine Sand Layers        | Traps microscopic suspended dirt   |
+------------------------------------+------------------------------------+
| Activated Charcoal Layer           | Absorbs chemicals, toxins, & odors |
+------------------------------------+------------------------------------+
| Cotton Wool / Cloth Barrier        | Final polish, prevents sand leakage|
+------------------------------------+------------------------------------+
The Scientific Principle Explained:
This model demonstrates physical filtration, sedimentation, and adsorption. Each geological layer acts as a physical mesh that traps dirt particles based on size. Large leaves and twigs are blocked by gravel, smaller suspended clay particles are trapped by sand, and chemical contaminants are adsorbed by the activated charcoal.
5. Class 7 Science Exhibition Projects: Delving into Acids, Bases, and Simple Machines
Class 7 Science Exhibition Projects: Delving into Acids, Bases, and Simple Machines provides an immersive, interactive platform where abstract chemical reactions and physics principles come alive. By constructing hands-on models—such as natural pH indicators using turmeric, or functional pulley and lever systems—students transform complex textbook theories into tangible realities. This targeted exploration challenges young minds to analyze molecular properties and mechanical advantages directly. Ultimately, these interactive projects cultivate critical thinking and real-world problem-solving skills, empowering middle school students to decode the chemical balances and mechanical systems that quietly govern, optimize, and drive our daily lives.
6. Project 3 (Class 7): The Electrochemical Lemon Battery
This highly interactive science exhibition project for Class 7 demonstrates how chemical energy is converted directly into electrical energy, illuminating basic atomic structures.
Materials Required:
4 large, juicy lemons (citric acid source).
4 clean zinc-plated galvanized nails (acting as negative terminals).
4 clean copper coins or copper strips (acting as positive terminals).
Alligator clip connection wires (5 pieces).
A low-voltage LED bulb (red or green works best under low voltages) or a small digital clock.
A multimeter (to measure voltage generation).
Lorem ipsum dolor sit amet, consectetur adipiscing elit. Ut elit tellus, luctus nec ullamcorper mattis, pulvinar dapibus leo.
Step-by-Step Construction Steps:
Squeeze the Lemons: Roll the lemons firmly on a table to break the internal juice membranes. This releases the citric acid.
Insert Terminals: Insert a copper coin and a galvanized nail into opposite ends of each lemon. Ensure they do not touch each other inside the lemon.
Chain the Battery: Connect the lemons in series using alligator clips. Connect the copper coin (positive) of Lemon 1 to the zinc nail (negative) of Lemon 2. Repeat this chain across all 4 lemons.
Connect the Load: You will have a free zinc nail at one end of the chain and a free copper coin at the other. Connect these two remaining terminals directly to the legs of the LED bulb or multimeter.
Observe Voltage: Watch the LED bulb glow as the electrochemical reaction reaches critical potential.
The Scientific Principle Explained:
This model demonstrates an electrochemical cell reaction. The citric acid inside the lemon acts as an electrolyte. Zinc (Zn) undergoes oxidation, losing electrons, while copper (Cu) acts as an electron attractor. The flow of electrons (e-) from the zinc nail to the copper coin through the external connection wire generates a usable electric current
Students can access an array of similar virtual electronic circuit experiments on the world-class PhET Interactive Simulations by the University of Colorado Boulder to supplement their live demonstration.
7. Project 4 (Class 7): Hydraulic Robotic Arm Model
This mechanical project demonstrates the transfer of force using liquids, proving how heavy machinery operates in the real world.
Materials Required:
Stiff corrugated cardboard sheets.
4 plastic syringes (10 ml capacity).
Small, flexible aquarium plastic tubing (connecting the syringes).
Wooden skewers or paper clips (acting as hinge pins).
Water colored with food dye (for visual tracking of liquid displacement).
Hot glue gun, scissors, and a drill tool
Step-by-Step Construction Steps:
Cut Cardboard Segments: Cut three cardboard strips to represent the base, arm, and gripper claw of your robot.
Assemble the Hinges: Pivot the cardboard arm to the base using wooden skewers as pins. Make sure the joints can rotate smoothly.
Mount the Control Syringes: Mount one syringe on the base, connected physically to the moving arm segment.
Connect the Tubing: Fill a second syringe with colored water, connect it to the first syringe via the flexible plastic tube, and push all air bubbles out.
Assemble the Gripper: Construct a simple cardboard clamp claw on the far end of the arm, controlled by a separate syringe-and-tube circuit.
Operate the Controls: When you depress the syringe on your remote controller, the hydraulic fluid pushes the syringe plunger on the arm, moving the robotic limb smoothly.
The Scientific Principle Explained:
This project demonstrates Pascal’s Law of Hydrostatic Pressure. According to this physical law, when pressure is applied to a confined, incompressible fluid, the pressure change is transmitted equally in all directions throughout the liquid, allowing a small mechanical force on one end to translate into a heavy lifting force on the other.
8. Class 8 Science Exhibition Projects: Stepping into Advanced Forces, Space, and Electricity
Class 8 Science Exhibition Projects: Stepping into Advanced Forces, Space, and Electricity offers a sophisticated, experiential playground that challenges students to bridge foundational science with cutting-edge concepts. Moving beyond basic models, learners design advanced projects like electromagnetic cranes, hydraulic arms, and scale models of solar systems or rocket propulsion. This hands-on exploration forces students to grapple with real-world variables, calculation, and design thinking. Ultimately, these advanced projects cultivate a robust analytical mindset and engineering temperament, preparing middle school minds to decode the complex gravitational forces, cosmic mysteries, and electrical grids that power and define our modern technological era.
9. Project 5 (Class 8): Highly Sensitive Gold Leaf Electroscope (Static Detector)
This project demonstrates the presence of static electric charges and the principle of electrostatic induction, serving as an outstanding best science project for Class 8 students.
Materials Required:
A clean, dry glass jar with a plastic lid.
A thick copper wire (approx. 15 cm long).
Aluminum foil (cut into two small, identical drop shapes).
A hot glue gun or rubber stopper (to seal the lid).
A plastic comb, a balloon, and a woolen cloth (to generate static charges).
Sandpaper (to clean the copper wire).
Step-by-Step Construction Steps:
Prepare the Lid: Poke a small hole directly through the center of the plastic jar lid.
Shape the Copper Wire: Thread the copper wire through the hole. Twist the top end of the copper wire into a flat coil or hook (to act as the charge collector). Bend the bottom end inside the jar into a small, clean “L” shaped hook.
Mount the Foil Leaves: Smoothly hook the two aluminum foil drops onto the “L” shaped copper hook. Ensure they hang loosely and are in physical contact with each other.
Seal the Jar: Screw the lid tightly onto the glass jar. Use hot glue around the hole to ensure the wire is held securely and the jar is airtight to prevent external draft interference.
Generate a Charge: Rub a balloon or plastic comb vigorously against a woolen cloth to generate negative static electric charges.
Run the Test: Bring the charged balloon close to (but not touching) the top copper coil. Observe how the two aluminum leaves inside the jar instantly diverge and fly apart.
The Scientific Principle Explained:
This model demonstrates electrostatic induction and like-charge repulsion. When the negatively charged balloon approaches the copper coil, it repels the free electrons in the copper wire, forcing them down into the aluminum leaves. Because both leaves now possess an identical negative charge, they experience strong electrostatic repulsion and fly apart, as modeled by Coulomb’s law of charges.
10. Project 6 (Class 8): Arduino-Based Smart Soil Moisture Sensor
This advanced project combines basic electronics with modern environmental conservation, proving how smart agriculture can prevent water wastage in the farming sector.
Materials Required:
A simple Arduino UNO microcontroller board.
An analog Soil Moisture Sensor module (Y-69 probe and comparator).
A small 5V mini water pump.
A 5V relay module (acting as an electronic switch).
A breadboard and jumper connection wires.
A plastic container filled with dry soil and another with wet soil.
A laptop (to upload a simple 10-line C++ control code).
Step-by-Step Construction Steps:
Connect the Sensor: Connect the soil moisture sensor probe to the comparator module. Connect the VCC, GND, and Analog Out (A0) pins of the sensor directly to the corresponding pins of the Arduino board.
Connect the Relay: Connect the input pin of the relay module to digital pin 8 of the Arduino. Wire the mini water pump to the relay switch contacts and a battery pack.
Upload the Code: Upload a basic diagnostic code to the Arduino. The code reads the moisture value: if the soil moisture falls below a certain threshold (<30%), it signals digital pin 8 to activate the relay, turning on the pump.
Demonstrate Smart Irrigation: Place the sensor probe into the container of dry soil. The sensor flags the drought condition, activating the water pump to irrigate the plant. Transfer the probe to the wet soil; the sensor instantly shuts down the pump.
The Scientific Principle Explained:
This project demonstrates automation and electrical resistance. Dry soil has a high electrical resistance, while wet soil (containing water and dissolved minerals) has high electrical conductivity. The moisture sensor measures this resistance and passes the analog voltage signal to the microcontroller, which acts as the brain to automate water consumption.
To check similar project listings, guidelines, and get inspiration from award-winning student ideas, check out the resources aggregated on the Science Buddies Educational Project Hub.
11. Presentation Secrets: How to Win Over the Exhibition Judges
Building an outstanding working model is only half the battle. To win a prize at a school exhibition, you must present your project with confidence, clarity, and authority.
Draft a 2-Minute Elevator Pitch: Do not wait for judges to read your display board. When they approach your table, greet them warmly and present a concise summary: “Our project demonstrates…”, “We constructed this using…”, and “The real-world application of this is…”.
Design a Clean, Visual Display Board: Use clear, large headings, neat diagrams, and a point-wise layout on your backdrop chart. Avoid writing long, dense paragraphs of text.
Maintain an Active Error Log: If your project did not work perfectly on the first try, document it! Judges love to see a student’s “Error Logbook” showing what failed, how they analyzed the mistake, and how they modified their prototype to achieve success.
Explain the Real-World Utility: Always connect your model to a major global crisis. For example, explain how your hydraulic arm can be scaled to help search-and-rescue teams, or how soil moisture sensors can combat groundwater depletion.
12. Conclusion: Inspiring the Next Generation of Scientists
The definitive verdict for school science exhibitions is highly encouraging: the best project is not the most expensive or complex one; it is the project built entirely by the student’s own hands, backed by deep conceptual understanding.
By selecting the right project for your grade level—whether by demonstrating light refraction with Class 6 solar ovens, exploring chemical reactions through Class 7 lemon batteries, or showcasing automated engineering through Class 8 smart sensors—you can build a highly competitive and confident academic mindset.
Do not let fear of failure, messy wiring, or complicated steps hold you back. Embrace the trial-and-error process of active learning, research guidelines on national portals, practice your presentation speech, and walk confidently into your exhibition hall ready to inspire, educate, and conquer.